
Faster, Better, Stronger; How To Speed Up Your WordPress
Keeping your site fresh with content is enough to keep even the most organised person busy for a few hours, but what is the point of writing fresh, exciting and keyword rich content if all of the visitors that arrive at your website are struggling to view your articles? A lot of people seem to think that their blogs and websites will be okay if left unattended however we know that this is not the case and as you continue to put more an more content and images into your site, the site itself becomes slow.This can all be avoided if you can keep on top of your site with some pretty handy plug-ins as well as a few choice tips and tricks.
No one likes to see their site become slow and clumsy, it puts people off due to the overall experience the user/reader has and this can affect your traffic if not taken into serious consideration early enough. That’s what this article is all about – helping you to keep your WordPress website up and running cleanly, and as fast as possible with the minimum effort. However I won’t lie; there are a few things that will be a little time consuming but isn’t it better to take the time to fix any bugs and glitches you may have so that your readership can have a smooth ride all the way through your website? I hope these 15 tips help you to speed up website and keep your readers happy, they have certainly helped me.
Use Firebug and Yslow

Before we start optimizing your site you need to find a way to measure your improvements. The best way to do this is to use Firebug in combination with YSlow which gives you detailed information about how long it takes to download your website and how much bandwidth it uses up.
Then before you start optimizing your site write down all this information. That way it will be easy for you to track whether what you have done has really improved your site speed. And at the end it will be a great thing to look back and realize how much bandwidth you have saved. For me I went from 360KB to 220KB without even complete optimization.
W3 Total Cache
Installing a cache for your blog is essential, especially for websites that get a lot of traffic. Whenever someone visits your blog the back-end has to put together the whole site and then present it back to the user. What a cache does is to simply save the created page and to show it to the next user. That way you save load time because the server doesn’t have to compile the whole website every time a user visits the blog.
That’s exactly what W3 Total Cache does. But it also does a lot more. Simply install it and it will by default also compress your pages, CSS, Javascript, minify HTML code and a lot more. So just install the plugin.
The default settings are pretty good but need to be extremely optimized. This is beyond the scope of this report, but if you want to learn about configuring W3 Total Cache right then read this excellent tutorial. It covers everything you need to know.
Smush the Pictures
One of the things that takes most of the the loading time are images. Whenever you use images you should be careful. If you use high quality images on your blog then you should make sure that they have smallest file size possible, without losing quality.
One of the best things you can do in order to save bandwidth and thus decrease your loading time is to remove unnecessary information from pictures. Usually when a picture is taken, all of the information is stored in it such as the camera it was taken with, the lense that was used etc. In order to save space you need to remove this information and that’s exactly what Smush.it does. It’s a WordPress plugin that automatically decreases the size of images, without losing any quality, whenever you upload an image to your blog. This can dramatically increase your blog speed.
Tip: Once you have installed it go back to your blog dashboard and go to Media ? Library. There will be all the pictures which you have already uploaded. Optimize them individually by clicking on the Smush.it now! link.
Scale Pictures

Most of the bloggers download pictures from sites like Sxc.hu, Flickr etc. these days. Normally the images you download from there are way too big to simply upload them to a blog.
So before you upload an image to a blog be sure to run it through Photoshop or Gimp (a free Photoshop alternative). Within the program select the option Image Size or Scale Image. Then scale the image down to at most the width of your blog’s content section, usually this is around 500-580 pixels. Afterwards simply save it and upload it to your blog.
Save Pictures in the Right Format
Some people make the mistake of using the wrong image formats when saving pictures. The three most popular image extensions are .png, .jpg and .gif. Each of these formats have different advantages.
Whenever you have an image like a picture (taken with a camera and without a lot of writing) you should use the .jpg extension. If you have a simple image on the other hand with only a color background and some writing, without any fancy effects, then save it as .png or .gif.
The best way to learn what type of format when to use, is to simply go ahead and save pictures in all three formats. Then take a look at the file size and the image quality. That way you will get a feel for when to use which image format.
Upgrade WordPress
Upgrading to the latest WordPress version is necessary because upgrades usually include several performance upgrades and they further fix bugs which could slow down your server.
Therefore download the latest version of WordPress.
Pick the Right Web-host

One of the easiest ways to have a faster blog is to choose the right web host. There are lots of web hosts that lure people in by promising low prices. But don’t decide a web host based on the price.
Before you decide on a web host be sure to spend some time researching and figuring out the right host. Ask friends and look for reviews on the Internet (but be careful there are a lot of biased reviews out there). The right web host can dramatically increase the speed of your blog.
I can only recommend Hostgator, it’s the best web host I’ve ever used.
Don’t Rely Heavily on Other Websites
Whenever you include an object from another website, a script, image or something alike, the browser has to perform an additional DNS query for that website in order to find out it’s IP address. This usually takes a while. In order to stop this from happening simply host the code or the image yourself.
Tip: Whenever you are deciding on promoting a product as an affiliate, don’t just copy and paste the code that is given to you on the affiliate page. Around 80% of these banners have a bigger file size then they should have. Be sure to download and optimize them using Smush.it before uploading them to your blog. Sometimes also changing the image format helps to reduce the size of the banners.
CSS Includes to the Top
All CSS files that are used on a web site should be included in the header section or the header.php file.
Putting CSS files in the header means that the content can be rendered progressively. This means with every CSS file that is downloaded the page, that the visitor sees, will become more complete, and thus will indicate progress to the user.
Javascript Includes to the Bottom

Javascript is used on most web sites these days. Usually though Javascript is not used to render content or anything of real importance. Therefore it makes sense to move the Javascript code into the footer (or the footer.php file). The biggest reason for doing so is that usually a web browser can download two files in parallel, with Javascript this is different:
While a script is downloading the browser won’t start any other downloads, even on different hostnames. The browser therefore has to wait for the whole script to be downloaded before it can download any other data.
Internal CSS and Javascript
Every sort of internal stylesheet or Javascript code should be avoided if you aim at increasing your web server’s speed. The reason for that being that servers can’t cache internal code. Therefore every time a person visits your web site the internal data is downloaded again.
So try to use external stylesheets.
Flush Early
A web server has to generate a web site every time a person visits it. Usually the web server creates the whole code and then sends it to the visitor. By using the flush function from PHP, the server sends a message to the browser right after having created the header. That way the browser can already load the files linked to in the header while waiting for the other part of the page.
To use this flush function on your web site add this code to the header.php file, right after the </head> tag:
<?php flush(); ?>
Database Calls

Reducing the number of database calls is another requirement to speed up WordPress. This is easily done by swapping dynamic properties to static ones:
Instead of
<link rel=”pingback” href=”<?php bloginfo(‘pingback_url’); ?>” />
you could use
<link rel=”pingback” href=”http://yourwebsite.com/xmlrpc.php” />
which is static and thus does not require a database query. If want to read more about this then this post about speeding up WordPress.
Use Shorthand CSS
Shorthand CSS is a technique to reduce the size of your stylesheet files which is supported by every browser. Instead of writing:
.link { padding-top:3px; padding-right:10px;
padding-bottom:5px; padding-left:2px; }
you could write:
.link { padding: 3px 10px 5px 2px; }
which is a much shorter version of the code above. WPCandy has created an article which describes the steps taken to reduce CSS files more perfectly than I do.
Reducing the Number of Plug-ins
Obviously this is an essential step to decrease the load time. Every WordPress blogger uses lots of plug-ins but are they all really needed?
Just ask yourself whether a plug-in adds value to your blog. If it does than keep it running, otherwise get rid of it.
Split Comments into Different Pages
If you are getting lot’s of comments on your blog then it might make sense to split the comments onto different pages since otherwise the server load for loading one page will be too high. You can do this via your WordPress dashboard.
Go to Settings -> Discussion. There should be an option Break Comments into Pages of … and just activate it.
Optimize your Database Every Week
Optimizing your database is important because essential it helps to reduce the load time. You can either do this manually or just use a plugin, either way should work fine.
If you want to use the plugin then download the Optimize DB plug-in, upload it to your blog and activate it. Then go to Tools ? Optimize DB and click on Optimize Now.

If you want to do this manually then go and log into phpMyAdmin. Find your WordPress tables and select all of them by clicking on the check boxes. At the bottom of the page you should then be able to choose the Optimize Table and/or Repair Table option. This will reduce the database size.
Disable Post Revisions
Post revision is a nice feature of WordPress but have you ever used it? I have only used it once or twice and even then it was not necessary. The problem with post revisions is that it puts a lot of additional load on your server.
To be able to open up an old post revision, WordPress has to save the old article in the database. This means that an article is put twice into the database if you have edited it twice. Think about this. Maybe you have been editing an article for a long time. Maybe there are 10 post revisions (which is not that rare) which practically means that the article exists 10 times in your database. Obviously this will add a lot of extra load on the database.
Just add this code to your wp-config.php file to disable post revisions:
<?php define(‘WP_POST_REVISIONS’,false); ?>
Delete Unnecessary Database Tables
This might be necessary since a lot of plug-ins use the database to store information. When the plug-in is no longer needed you just uninstall it, right? No. You also have to delete the entries the plug-in made in the database.
Not every plug-in does leave traces in the database but the some plug-ins do. To remove a table, log in to phpMyAdmin and select your WordPress table. Click on the check box next to the table you want to delete and then at the bottom on the page, choose the option Drop.
Be very careful about deleting tables in your database as you might end up removing the wrong table.
If you did disable post revisions it’s advisable to also delete the post revision table all together but as I said before always back up. Then enter this query to delete post revisions:
DELETE FROM wp_posts WHERE post_type = “revision”;
Prevent Content Scrapers from Consuming your Bandwidth
There are a lot of content scrapers these days. What they usually do is to visit your website and simply copy some of your content. They then go ahead and paste this content onto their own site.
The problem is that they usually also copy images which link back to your site. Every time a user takes a look at their copied content your server will have to serve the image which consumes bandwidth. This is also refer to as hotlinking.
In order to prevent this add this code to the .htaccess file in the root directory and replace the blog and image URL:
RewriteEngine On
#Replace ?mysite\.com/ with your blog url
RewriteCond %{HTTP_REFERER} !^http://(.+\.)?mysite\.com/ [NC]
RewriteCond %{HTTP_REFERER} !^$
#Replace /images/nohotlink.jpg with your “don’t hotlink” image url
RewriteRule .*\.(jpe?g|gif|bmp|png)$ /images/nohotlink.jpg [L]
That should prevent content scrapers from hotlinking.
Related articles
 22 Tips To Prevent Your WordPress Blog Being Hacked
 18 Alternative Ways To Use WordPress
 10 WordPress Tools Guaranteed To Boost Your Results and Productivity
 How To Create Amazing Search Functions For Your WordPress Blog
![New WordPress Install – 20 Things You Must Do [Checklist]](https://seo.maxiaodong.com/wp-content/uploads/2017/07/new-wordpress-install-2016-600x335-150x150.jpg) New WordPress Install – 20 Things You Must Do [Checklist]
New WordPress Install – 20 Things You Must Do [Checklist]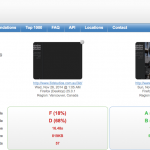 16 Ways to Speed Up Your WordPress Website Today!
 20 WordPress Plugins for Successful Internet Marketers
 How We Use ManageWP to Protect & Manage Our WordPress Sites
 10 Ways To Improve Blog Security (so that you don’t get hacked)
 18 Things Making Your Website Slow
 Blog Essentials – Setting Up Your Blog Using cPanel and Fantastico
 7 Best Plugins For Monetization